
A Bready Blog
I really enjoy cooking, it’s definitely one of my favourite pastimes. Any kind of cooking is fine with me, I am happy to give any recipe a go and most of the time it turns out well. I would say that of all the kinds of cooking, I particularly enjoy baking. Not “Great British Bake Off” level baking – nobody needs that stress! Just home baking, making tasty stuff to munch on. Biscuits, cakes, puddings, pastry and bread the things that I would say fall into the category of Baking. I feel that there is something satisfying about baking bread, using yeast for witchcraft that turns very basic ingredients into something super nice.
I have always enjoyed making bread and found myself doing it a lot more during 2020. It wasn’t because it was suddenly trendy to have a shopping trolley full of flour, yeast and toilet roll. I suppose that we have all just had more time to fill and bread making can be quite time consuming. There is also the fact that I ended up with an unreasonable amount of dried yeast early on in lockdown one. The supermarket shelves were stripped of yeast and the only solution was for me to buy a 500g packet from an eBay seller, who then accidentally shipped me two packets. 1kg is A LOT of yeast to get through, months later and I’m still on the first bag. It was actually a great buy because it has a quicker rise than the stuff that they sell in Morrisons. Bread isn’t the only yeast activated food that I enjoy making; homebrew beer kits are also a great lockdown time killing activity, but that’s for another day.


I’ve made lots of different types of bread, but most of the time I go for a basic loaf, originally based on a Jamie Oliver recipe that I have tweaked to my liking along the way. Using this recipe, I start with the basic quantities and adjust depending on what kind of flour and extra bits I’m using. So far all of my bread making activities have been using regular dried yeast because it’s reliable and quick. I might give sourdough a go one day; it just feels like a big commitment to have a living bubbling thing that you have to feed flour to keep it alive, just for bread making purposes. I’ll leave sourdough to the “Artisans”! I love a bit of sourdough toast with poached eggs and bacon on a Sunday morning, but I don’t want all of my lunchtime sandwiches made from chewy crusty sourdough. There is a place for sourdough and a place for lovely soft sandwich bread.
As I’ve said, most of my bread making is loafs. I buy different kinds of bread flours and have tried lots of combinations – there is an art to getting the balance right. My learning has been that a good proportion of strong white flour is usually needed if you want something that will slice and butter nicely for a tasty sandwich. I have made loafs with all wholemeal flour and they are lovely, but quite dense so better for toasting than for a sandwich. My usual proportion is 1/3 wholemeal bread flour to 2/3 strong white flour. On occasions I have used rye flour instead of wholemeal, that also makes a great loaf. I have a bag of Hovis Granary flour in the cupboard, which I had forgotten about and found this afternoon, that one will be my next loaf. I also like to add other bits and pieces; sunflower seeds, mixed seeds, caraway or fennel seeds – stuff like that. I didn’t bother this time, but it’s worth considering. I don’t usually put any seeds on top, mainly because I haven’t cracked the art of getting them to stay stuck.


I think that a lot of people are scared of making bread because the process takes half the day; so you have wasted a lot of time if it goes wrong. In reality the process isn’t actually that difficult and if you are patient you won’t cock it up. My biggest tips for bread making are:
- Lots of kneading – really knead it well, you need to develop the gluten to make a loaf that is bready and not crumbly. My patience for bread making has been massively extended since I got hold of an old Kenwood Chef stand mixer that previously belonged to Emily’s Grandma. The dough hook on the Kenwood does a great job at kneading, so that I don’t have to.
- Find somewhere warm for proving – none of us have a GBBO proving draw, but I’m sure that we all have somewhere cosy. I sit the dough bowl on a wooden chopping board atop an electric radiator. An airing cupboard by the hot water tank or boiler would work too.
- Give it the time that it needs to prove and rise properly – if it doesn’t look like its risen enough it probably hasn’t. Under-proved bread will be dense and heavy. Don’t waste all of your time for the sake of saving some time.
- Pre-heat the oven for at least 20 minutes – the oven needs to be nice and hot, and the heat needs to be even so that you get an evenly cooked loaf with a good crust.
The one thing about bread making that I really need to get more practiced at is shaping the dough for the final rise. I have described the method that I use in the recipe, it works fairly well although it still ends up with a “rustic” look. I’ve not attempted a plaited loaf for a while, they always look pretty jazzy. My loafs tend to be hand shaped and cooked on a baking tray as I only have small loaf tins. Most bread recipes are for 500g flour, which would be fine for my loaf tins but it makes a much smaller loaf than you would get from a baker or the supermarket. I prefer a bigger loaf, so made it bigger.


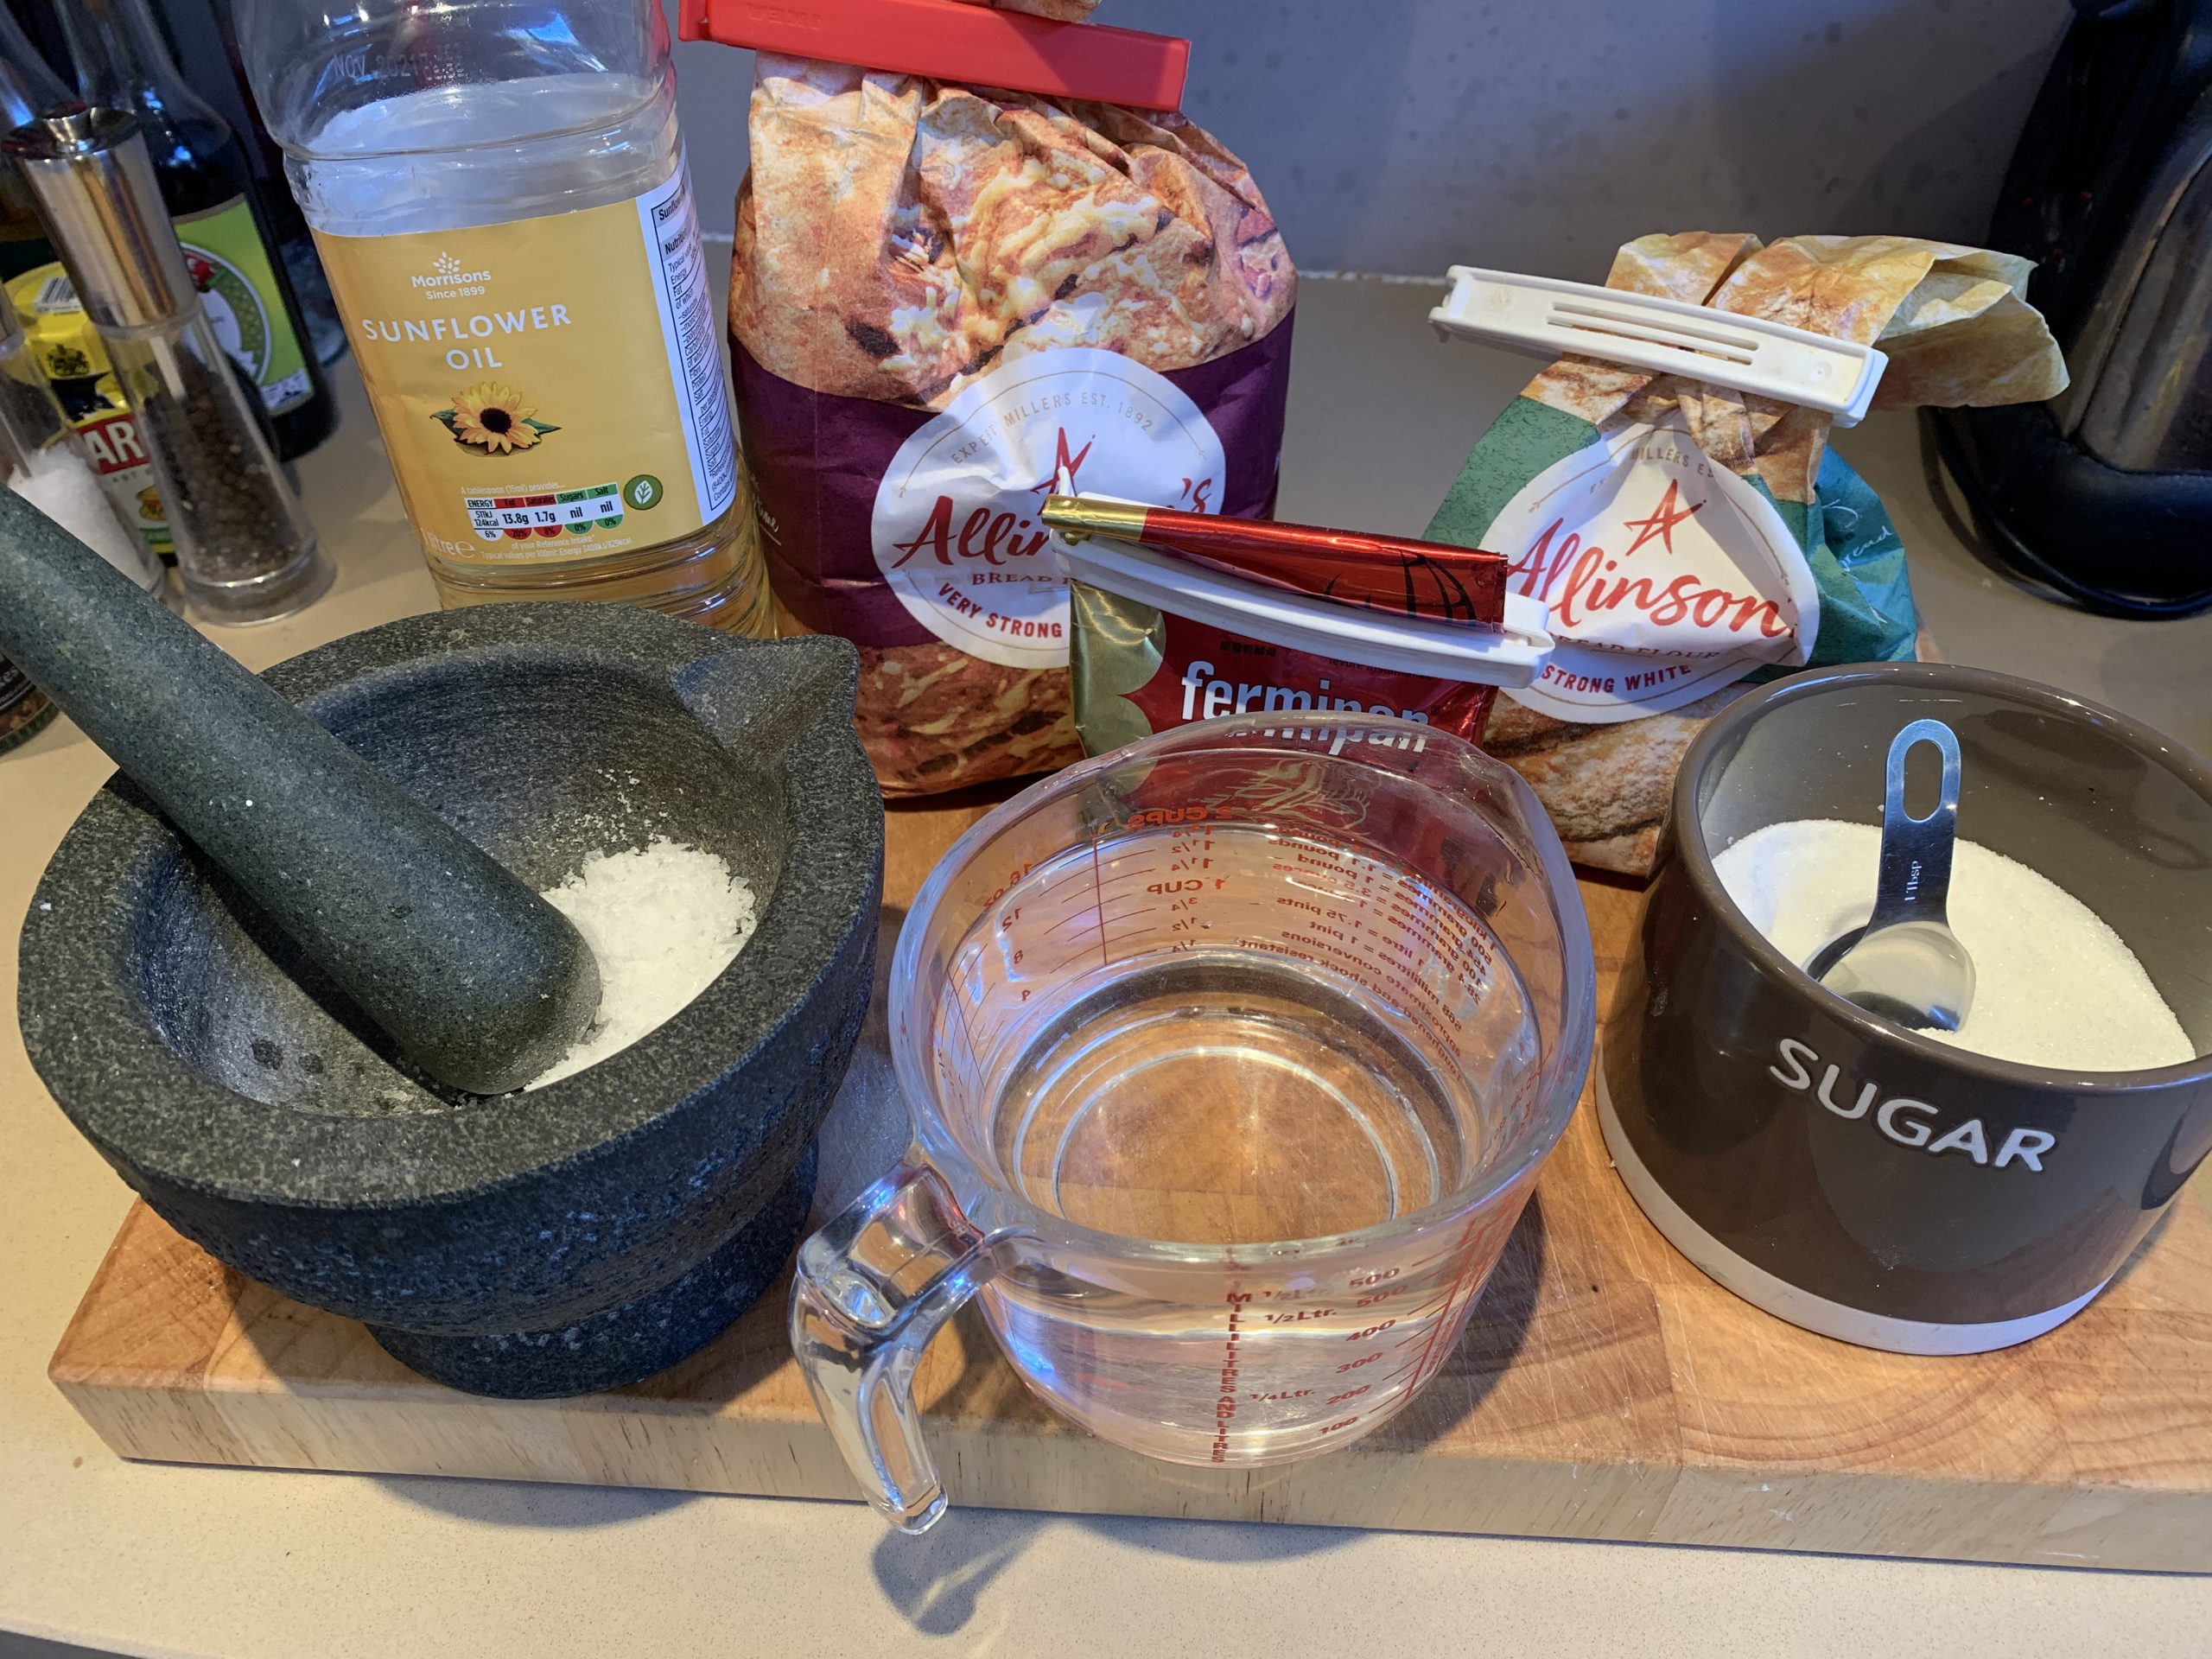
Mike’s Bread Recipe
500g Strong White Bread flour (plus extra for dusting)
250g Wholemeal flour
3 tsp (1 ½ Packets) Dried Yeast
3 tbsp Sugar
3 tsp Salt
2 tbsp Oil
About 500ml Warm Water
Optional:
Handful Pumpkin Seeds or other seeds
2 tsp Fennel or Caraway seeds


- Weigh out the Flour, yeast, sugar, salt and seeds into the bowl of a stand mixer. If you don’t have a stand mixer, you just need a big bowl. Mix the dry ingredients together well.
- Add the oil and then start mixing with a dough hook on a slow speed (or start mixing by hand). Gradually add the warm water until the mixture comes together to form a soft dough that isn’t too sticky. You might need more water, you might need less – it depends on the type and absorbency of the flour. If you add too much water, chuck in some more flour.
- Keep the stand mixer running on slow for around 10 minutes or Kneed by hand for 15 minutes.
- Rub a big bowl with oil, form the dough into a ball and place in the bowl, cover with oiled cling film. Place somewhere warm until doubled in size, for me this usually takes around one and a half to two hours.
- Sprinkle some flour on a work surface and tip the dough out. Flatten into a large rectangle then fold the ends into the centre and fold in half again. Flatten out this rectangle the roll up from a short end like a swiss roll. Tuck the ends under to form a nice loaf shape and then flip over and pinch the seams together along the bottom.
- Oil and flour a baking sheet and place the loaf on it, right side up. Oil some cling film and loosely drape over the loaf. Place somewhere warm to prove again until doubled in size. It should be quicker this time, hopefully about an hour.
- Place an empty baking tray in the bottom of the oven. Pre-heat the oven to 180°c (Fan).
- Boil a full kettle of water.
- When the loaf has risen, carefully remove the cling film and use a sieve to sprinkle the top with flour.
- Now you need to put some diagonal slashes on the top – these will open up during baking and hopefully stop the loaf from splitting in other places. You need a really sharp knife; I usually use a fresh Stanley knife blade or scalpel. Clean fast strokes.
- Pour the kettle of boiling water into the hot tray in the bottom of the oven and place the bread on the shelf above. The steam will help develop the crust.
- Bake for around 40 minutes, I usually rotate the loaf halfway through to ensure an even bake. To check if it is done, carefully flip it over and tap on the bottom of the loaf – it should sound hollow. Cool the loaf on a rack.
- If you have a bread bin your loaf should last in there for a few days. I prefer to slice the whole loaf and then put it in a plastic bag in the freezer. It will last well in the freezer, and you will always have bread.

Coulsdon Commons

You May Also Like

Malted Bagels… or Beigels?

A new website and a Vegan Shepherds Pie
